

I have trouble fixing the terrible seams I’m getting. I’ve followed Elli’s print tuning guide and calibrated extruder, tuned PA (it’s now 0.035) and extrusion multiplier.
I’ve tried adjusting both retraction length and speed, but it doesn’t seem to have much impact. I’m not using “wipe on retract” or “retract on layer change”, I only retract if travel distance is longer than 3mm. Retract is 0.3mm @35mm/s.
I’ve tried reducing PA smooth time too, but this also doesn’t seem to have a noticable impact.
I’ve tried reducing seam gap from the default 10% in Orca all the way down to 0%, but the bad seams persist.
I’ve tried with “wipe on loops” both disabled and enabled with no difference.
I’ve tried with both arachne and classic wall generator, no difference.
I’ve tried different wall orders, inner/outer, inner/outer/inner and outer/inner, all with the same bad seams.
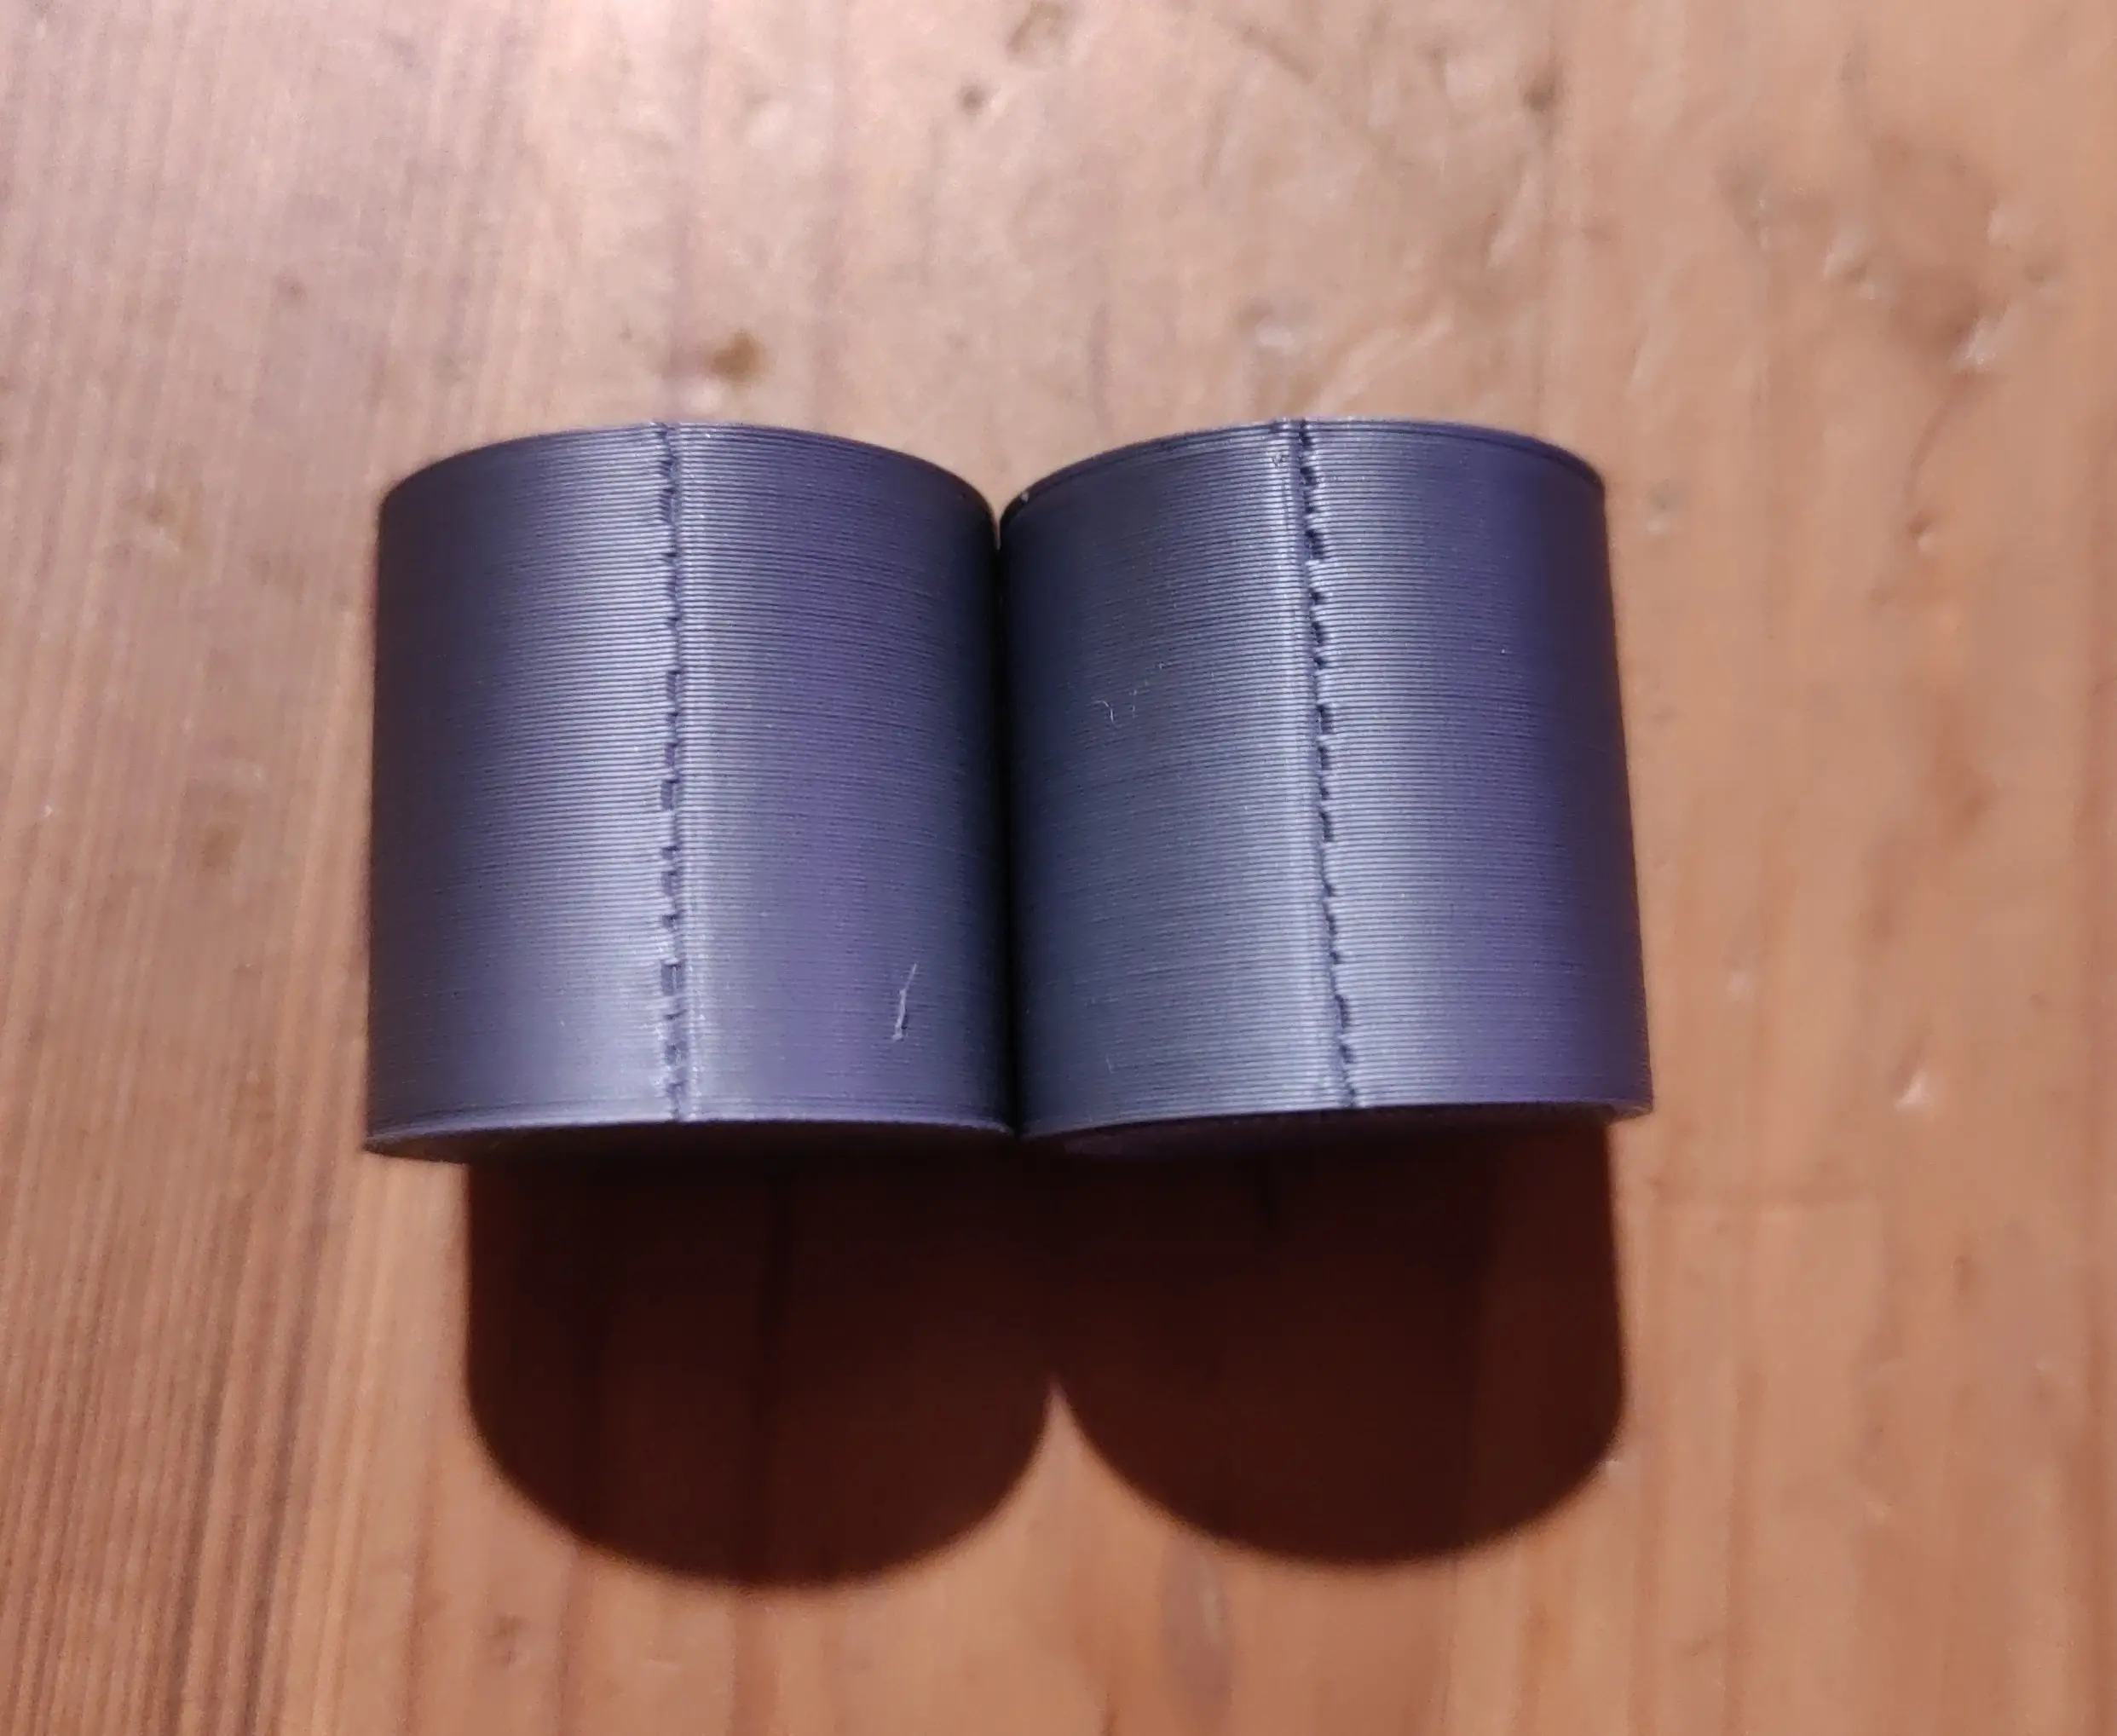
Filament in the picture is matte PLA, it is without doubt dry and generally prints well aside from the seams. It’s stored vacuum sealed with silica, and I use a filament dryer to dry if I suspect wet filament.
I’m running out of ideas for where to tweak to get a decent result.
You must log in or register to comment.
I have one just like that on my scrotum and was told it’s normal so I wouldn’t worry about it too much.
Yeah it’s just part of the injection molding process.
I wouldn’t know anything about that.
Have you tried being nice to the mold for a start?
Actually, it’s part of the vulva closing process.
In what can only be described as “perfect timing”, the 3d printing channel teaching tech uploaded a video about just this problem literally a day ago: https://youtu.be/vl0FT339jfc
Yeah I can see that the seams of his “before” models is actually look like what I’ve been able to achieve on mine now. I guess I was trying to fix the last bit with standard seam options which might not have been possible.
I’ll download the noisyfox orca slicer and test the scarf seams out.
That’s a really weird looking z-seam, something is going on there that I’m not quite sure the cause of.
However, in this case I think you could try randomizing z-seam position. It’s not gonna fix the issue completely but it might help you with this particular part.
Yeah I’ve tried that, but it’s still really bad, almost worse, with these scattered all over the surface.
Yeah I thought that might happen too. I’ve never seen seams like that before. What temp are you printing at?
It’s printing at 200C with fan at 100%, using a 0.4mm hardened steel nozzle.
Have you ever done a PID tuning?
Yes, I recently switched the hotend from a proprietary one to a regular volcano hotend and did PID tuning.
Did you notice this kind of thing happening before you switched your hot end? I’m assuming you’ve tested printing at a higher temp already but I have to ask anyway. 200C is kinda low for some PLAs.
Yeah I’ve tried 190-220C, which is the range specified by the manufacturer of the filament.
I don’t remember seeing this issue before the change, but I’m still new to the hobby and may just have overlooked or accepted it earlier.
Disclaimer: I’m not into 3d printing. I’m just a wannabe with not enough time on my hands, so take this post with a bucket of salt. I have, on the other hand, worked a lot with automated machinery.
But if I were to make a guess, I would suspect some slack in either the X or Y direction, resulting in inaccuracy when the nozzle changes direction. This should in theory be less visible when the nozzle is not making sharp turns.
Are your belts tight? Any gears with loose fitting teeth?
Also, are you able to turn the print (and the seam) 45 and 90 degrees? Do they show up just as ugly? If not, the issue is mechanically limited to one axis.
Actually yeah, you might be on to something there. OP could try adjusting belt tension.
If you do end up adjusting belt tension though, make sure to recalibrate your e-steps after.
It’s worth a look but I really suspect PA to be the culprit here. The differences between the layers are probably explained by the feed rate after or before the turn due to different path planning.
That retract distance seems a bit low to me. My (direct drive) printer is happier around 1mm to 1.5mm. I’m not convinced that has anything to do with your particular problem, though.
Anyhow, to my untrained eye that looks like underextrusion at layer change and/or the perimeter lines not actually hitting each other. Are you sure your pressure advance/linear advance values are correct for that filament?
Also, does Orca Slicer allow you to specify a negative value for the seam gap? If so, that might be worth fooling with to see if it has any impact. That’s probably a band-aid, though. I think your issue lies in pressure advance tuning still.
This is the filament I’ve tuned PA with, and to my best ability this is what Elli’s guide suggests is the optimal value 🤷♂️
But I agree, it does actually look like PA is tuned incorrectly and stopping extrusion too soon/starting it too late.
Try without PA, also try another filament
Also try normal brass nozzle and check if your new hotend is not loose
Tried without PA but there was no difference, going to try different filament next.
As I mentioned somewhere else in this post, it seems to relate to the infill. I’m using gyroid, and the seam lines up with the anchor point for the infill.
You can also try without infill 😉
Im throwing many things to try, but not in any particular order
Randomize Z seam and make sure your flow/retraction settings are as good as you can get them. Messing around with your nozzle temperature might help too.
Randomised seams just spreads the issue out on the entire model surface, it looks even worse like that.
It will probably help more once your settings are dialed in, otherwise, yeah it’s just going to distribute the mess. Alternately, keep everything as is and fix it up post-print via filler and sanding.
Randomize Z seam
There is never a situation where this is a good setting to have on.
Can’t say I agree but you print how you want.
There is a setting in super slicer called Seam gap, do you see a setting like that you can play with?
Yes I’ve already tried that, and it doesn’t make much of a difference.
Wiggle the nozzle is there any slop?
Nope, it’s rock solid.
Does the nozzle taste normal?
No clue, the heat completely numbed my tastebuds /s
Have you tried turning it off and back on again?
I’ve tried both on and off, but for some reason it’s not printing at all when its off…guess I’ll have to troubleshoot that some other time 🤷♂️
New Lemmy Post: How do I fix these god-awful seams? (https://lemmy.world/post/12523802)
Tagging: #3dprinting(Replying in the OP of this thread (NOT THIS BOT!) will appear as a comment in the lemmy discussion.)
I am a FOSS bot. Check my README: https://github.com/db0/lemmy-tagginator/blob/main/README.md
Have you tried checking the belts and all the bearings/rails for tightness and smoothness? It almost seems like layer shift at the seam, and if you compare both seams side by side, layer by layer, it almost seems like the print head shifts equally on both prints for any given layer (e.g. left print looks over-extruded while right print is under-extruded, next layer up, it flips and right print looks over-extruded while left print looks under-extruded).
If not the belts or other hardware, perhaps it’s a flow issue. Do you know if the gross looking seams are the start or the end of the layer?
Duct tape.
Most probably PA. You should try adjusting it while printing using some g-code console. This way you get immediate feedback. What they often don’t tell you is that pressure advance is not something you can calibrate once and forget, it’s dependent on material, temperature, nozzle diameter and also a lot on feed rate and extrusion rate.
The need for PA and precise tuning is more pronounced the higher changes in extrusion rate you have eg, you print very fast or with wide or high layers.
Just play around with it a bit and I’m sure that you’ll find a better value after some layers.
There are even macros that try to remove the feed rate dependency by effectively replacing every g-code that adjusts feed-rate by a combination of the original g-code pre-ceded by an adjustment of PA. I haven’t tried them out yet though.
What’s weird is the differences of the effect between the layers. Is the every layer the same or is the path different for different layers? Maybe post some images of the inside of the model.
This is a good idea. I will further add that Klipper lets you dick with the linear/pressure advance parameters mid-print via GUI with its Fluidd interface. Other systems probably have similar capabilities.
A good test model for this might be a thin walled hollow cylinder with the Z seam facing the user (i.e. out the door or front of the machine) only 2 layers thick or so. That sounds like it ought to make the issue visible quickly, and with minimum of wasted time and filament on infill (not to mention ruined parts).
So I stared at this for a while, particularly the pattern of the seam, I have a few questions. What type of infill are you using? how many outer wall loops? How much infill overlap (or whatever it is called)?
Also what happens if you rotate the part on the bed 90 degrees so the seam is on a different axis? Or maybe 45 degrees? This will make sure it’s not some sort of mechanical issue in one direct that shows up in this specific situation.
I know that all seems random but those are what I would check hah.
Issue seems to be following the seam when I rotate parts. in this particular example I am using 5% gyroid, if I switch to grid the defect is uniform along the part. This is just 2 walls, can’t remmber infill overlap, I’ll check tonight.
_ I’m not using … “retract on layer change”_
There’s your problem.
No, I’ve tried with that enabled as well, same issue. This isn’t before a layer change, it’s when it goes from extruding the walls to extruding the infill.
But even without infill this happens. It’s the end of the outer wall that doesn’t connect to the beginning of the outer wall and it’s not really fixed by reducing seam gap, so I’m not sure what’s actually causing it.
What slicer?


